Today we look at the last day of our three-day trad climbing adventure in Val di Fassa, in the heart of the Italian Dolomites. On day 1 we proved ourselves on Via Piccola Micheluzzi. We learned that some of the most iconic classic climbs are in fact within our skill level and that all we needed was a proper introduction. On day 2 we threw in a gorgeous scenic approach hike in Val di Vajolet while climbing Via Fehrmann on Torre Stabeler.
Now we had to figure out what to do on the last day before heading back to Trento. Perhaps something a bit more remote than Piz Ciavazes but also a bit less crowded than the Vajolet Towers? Maybe up the difficulty a tad bit too. What to do?
Once again, Cesare did not let us down, and he came up with just the perfect spot without much effort. We were going to climb something on Roda di Vael. At this point he was confident in our climbing skills, and we were confident that he knew what was best for us. There was no need for a lengthy back-and-forth. In fact, we didn’t know what route we were going to climb until the morning of the climb.
Getting to Rifugio Roda di Vael
Since this is an extremely trail-rich area, there are many ways to reach Roda di Vael. We decided to drive to and take the chairlift up the west slopes of Roda di Vael. Purists might say that taking a chairlift is cheating, but taking a chairlift in the summer hits different, and we just didn’t want to skip it.
The chairlift only opened at 8:30 in the morning, and it was just a 20-minute drive from our hotel to Passo Carezza, so we agreed to meet at 8:00. This luxurious late start gave us the chance to enjoy the hotel breakfast without rushing. Finally.
Cesare picked us up at 8 a.m. sharp, in a good mood as always. We took the winding SS241 up from Vigo di Fassa up to Passo Carezza. While safely but enthusiastically overtaking all the slow traffic, Cesare explained:
The Italian tourists drive the slowest by a large margin, then you have the internationals, followed by the locals. And finally the local buses. The buses don’t mess around, and they’ll smoke you on any day.
There you have it. Do better, Italian tourists. Live up to your international driving reputation.
We arrived at Passo Carezza at 8:20 with ample reserve to catch the first chair. There’s right by the lift.
Overnight Parking at Passo Carezza 
You can also stay there parked overnight. They recently expanded the parking lot with van-lifers in mind, and on paper it looks pretty damn good. Plenty of space, cool location, only about 10 eur per night… but, as we discovered while trying to car-camp there, there’s a catch.
We rolled into the parking lot, found a good spot, and Daysi says:
I’m going to find the bathroom, and you can sort out paying for the parking in the meanwhile.
Sounds pretty straightforward. Until it isn’t.
The sign tells you that the rate is 1 EUR per hour between 19:00 and 7:00. Ok. What it doesn’t say is how to actually pay for it. After 10 minutes on obscure German travel forums online, I learned that supposedly there is one there, and it only accepts coins.
I eventually found the meter, but I only had about 7 EUR in coins. Welp, that bought us till 2 a.m. Having no other option, I took the ticket and slapped an extra 5-euro bill behind the windshield, hoping that if anyone comes checking, we’ll be able to sort it out.
Daysi, in the meanwhile, came back equally defeated. There is a nice-looking bathroom, but it’s only open during the day until 5 p.m. Helpful.
There’s a single dinner option within walking distance there, , but our experience there was on par with everything else. The place was packed with locals, so we were lucky when we got a spot at the last open table. The waitress was polite but clearly overwhelmed. She immediately forgot about our order. We only got our pizza after we reminded them about 45 minutes later.
Overall, we gave this car-camping experience 3/10, but it was mostly down to us not being prepared. If you have a self-sufficient van setup, this can be a top-notch spot.
You can buy the tickets right there at the counter by the lift. Easy peasy. But in all transparency, I’m going to say it ain’t cheap. The return ticket amounts to a hefty 25 EUR. We were prepared to buy the ticket for our guide too, but it turned out that guides usually have a year-round pass. We paid “only” 50 for the both of us, which is way more than we expected. But then again, there are worse things to pay 50 EUR for than a scenic chairlift ride over beautiful meadows basking in the early morning sun.
Alternatively, there is a further up the road through the pass. It gets quite busy, but if you manage to find a spot, you can then take trail 548 and skip the lift entirely. That’s what we did when we returned to the area for a different hike later in the summer.
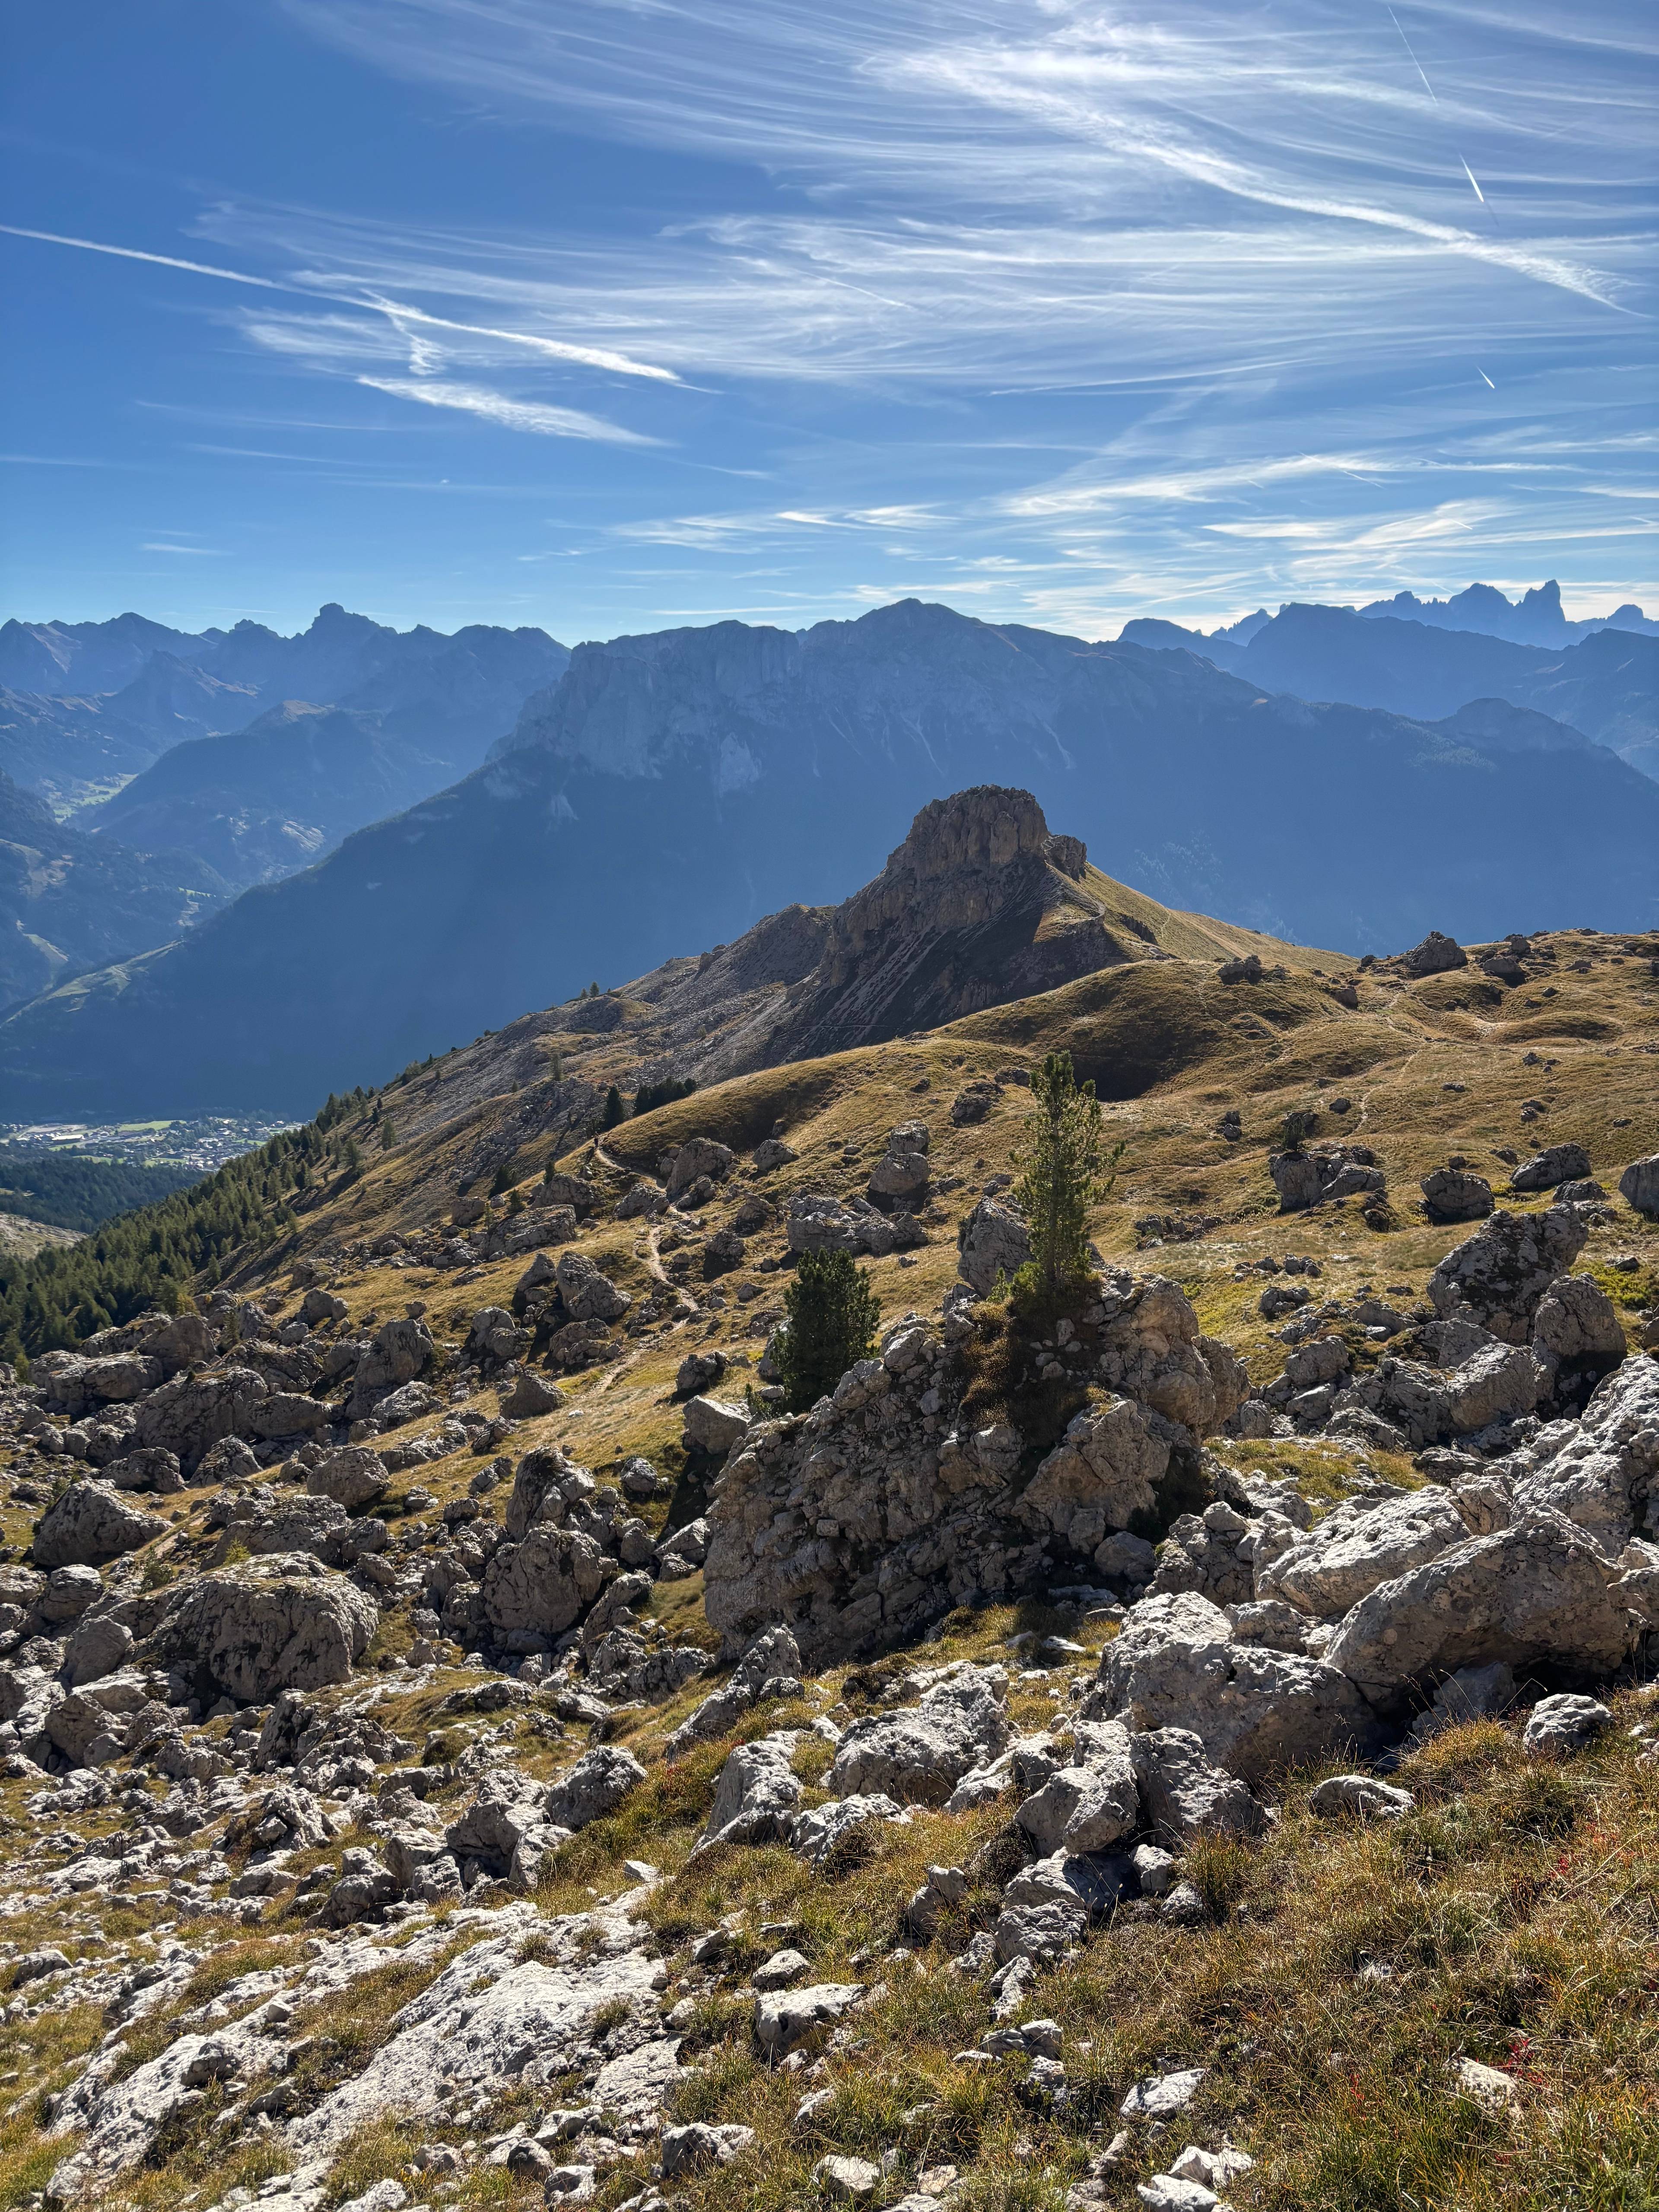
While riding the chairlift up, Cesare, as always, gave us the lay of the land. There are two main prominent peaks — and . There are some epic classic routes straight up the west face of Roda di Vael. The main one was apparently affected by a huge rockfall a few years ago, but as Cesare told us, it is back, it has been climbed since. It’s so back. There is also a via ferrata up there on the ridge, apparently on the more difficult end but very scenic nonetheless. We might be back to bag that one next year.
The chairlift ends by . We hadn’t stopped there because we had rock to climb. Besides, there are better options later. Instead, we took trail 539 south. The trail loops around the mountain on a mellow incline before it joins trail 549. That one continues the loop, following the contour line and maintaining elevation all the way to . All in all, it takes about 40 minutes from the upper station of the chairlift to the rifugio. It was only 9:15, and we were already sipping our coffees.
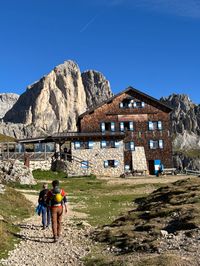
Rifugio Roda di Vael is the last hut before going up to the climbing routes and the via ferratas, and it is definitely worth the stop. It’s almost 120 years old, very cozy, and packed with history.
Apart from good coffee and cool history, they also have an overview of all the climbing routes in the area. And they even have them online on their website. How cool is that?
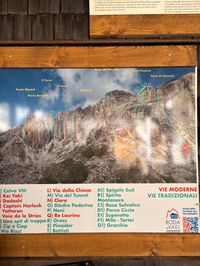
That’s also where we learned what route we were going to climb, the Via del Gracchio. Gracchio is a black bird common in the area, recognizable by its characteristic call. The route itself is a relatively new (2005) trad route of 7–8 pitches up to UIAA 5+. You can find it on , one of the satellite peaks of Roda di Vael.
From a distance, Torre Edwards is almost invisible as it blends with the neighboring and with Roda di Vael behind it. Torre Finestra, which literally translates to “The Window Tower,” is named after an interesting formation in its upper part resembling a rock window.
Both towers share the same base and only split above a horizontal band of grass. Similar to Piz Ciavazes, this grassy patch is where the descent trail is — only much shorter.
Approach to Via del Gracchio
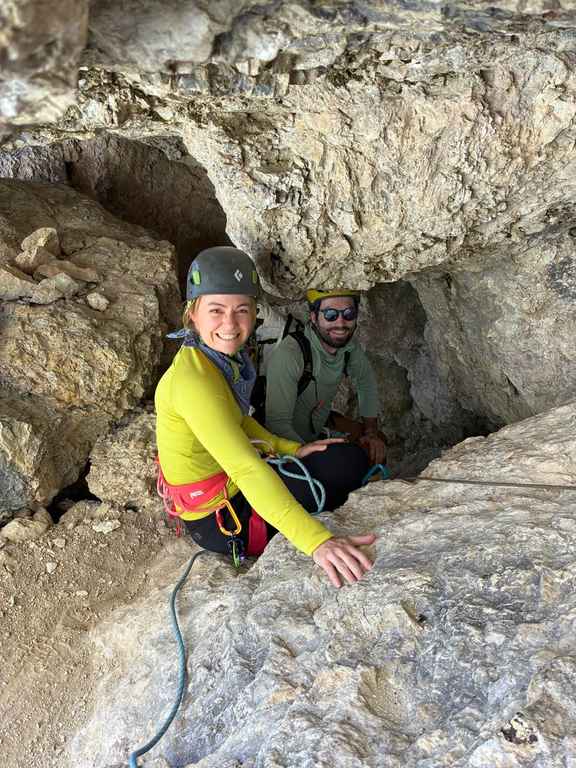
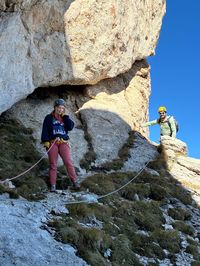
Having inspected the route from the safety of the rifugio, it was time to tackle it head on. The final approach is very straightforward. Just follow the obvious trail for about 15 minutes, and the route will be on your left. You do need your approach shoes, though — both for the approach and especially for the hike back. So don’t bank on stashing everything at the rifugio.
We left the hut at 9:30, and by 9:45 we were already putting our climbing shoes on. There is nothing obvious marking the actual beginning of the route, but you can use our . Or, alternatively, if you don’t start at exactly the same point, it shouldn’t be such a big deal. The first two pitches sort of naturally funnel you to where you need to be for pitch 3.
Full Approach to Via Gracchio GPX GPX
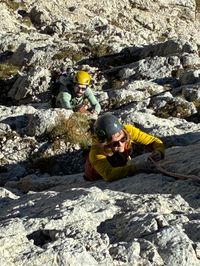
Climbing Via del Gracchio
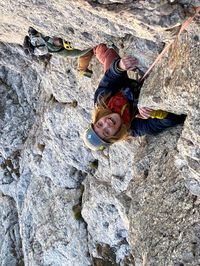
For the first three pitches, you basically aim for this overhanging arête made of yellow rock. All the climbing is on the NE-facing wall, so even at 10 a.m. we were climbing in the shade, and it was pretty chilly. The route is all above 2400 m, which is a respectable elevation. Very different from a sunny crag at the bottom of a valley.
The first pitch is slabby on superb rock. Very welcoming. You just go straight up and enjoy the good holds. The second pitch was also pretty chill. I think there are multiple ways there — it is a trad climb, after all — but generally it seems that the farther left you go, the steeper the climbing gets, and the farther right you go, the easier it gets. Just don’t wander too far in either direction; you’re still aiming for the yellow arête above you.
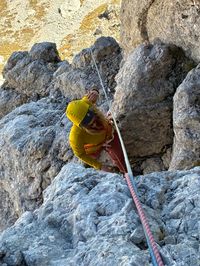
The third pitch was where the fun began. From the belay station we traversed a little to the left and had to make a couple of airy moves to get on and over a bulgy piece of rock. There are still plenty of good holds; it’s just not the same as the slabby scramble you did until now. In the upper part of the pitch, you get into a dihedral with a crack and you have to do some stemming moves. You feel like you’re finally putting your body to work.
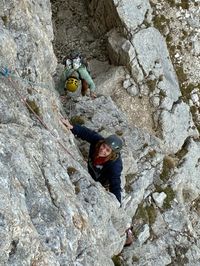
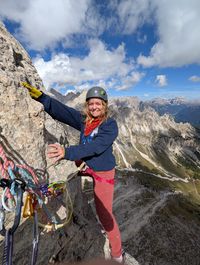
The third pitch spits you out onto a comfortable ledge just below the yellow overhanging arête. From there, you take a sharp left, and the traverse on pitch 4 begins. That one is really just about not getting the rope stuck somewhere and not getting all tangled in it. The good news was that at that point we swung around to the east face of Torre Edwards, and we were back in the sun. It felt so good.
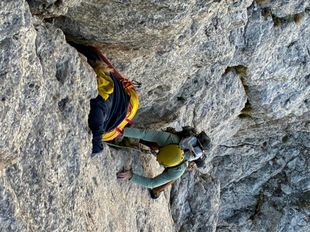
Pitch 5 and 6 are fun, sustained climbing on good-quality dark rock. You again do some laybacking and stemming around another vertical crack. Pitch 6 is the slightly less difficult of the two, and it ends by exiting onto the grass patch. Up there you make a few steps uphill and to the right to where the last pitch(es) begin.
The last section, above the grass band, is where the two towers are actually distinctly separated. You can do this section in one go, but the crux is in the very upper part, and you might want to split it into two pitches. At least that’s what we did.
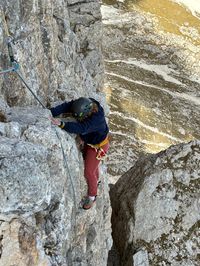
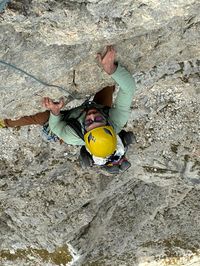
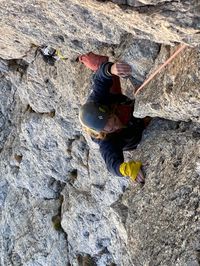
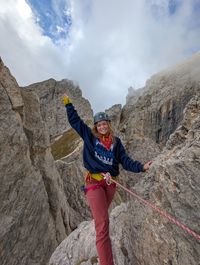
Pitch 7 starts with a flaky ramp going left. The climbing gets progressively more vertical as you get higher. At some point you traverse a bit to the right and back again and do a few harder moves straight up, leading to the intermediate belay station. Above it is the crux of the whole route: a few more technical moves with some delicate stances. At some point I wished I had done some more stretching before. But overall it was a really fun pitch, and both Daysi and I made it up unscathed.
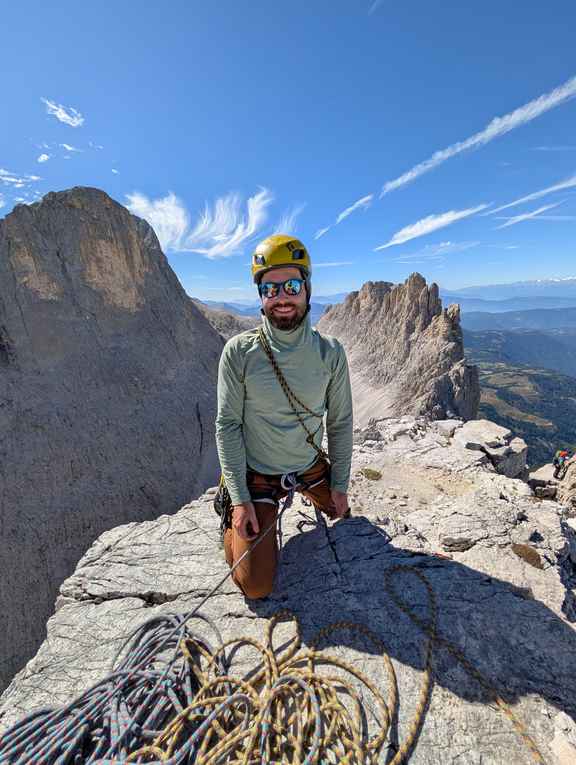
We started climbing around 10 a.m., and we made it to the top at 13:25, so overall it took us just under 3.5 hours.

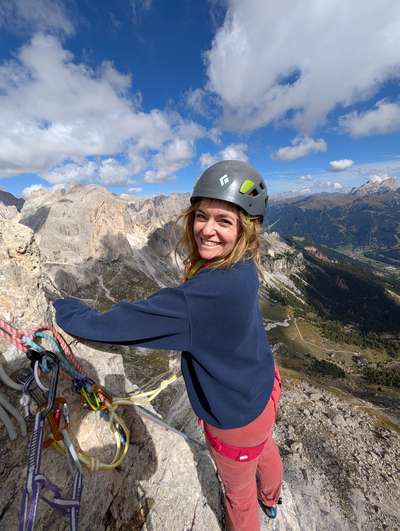
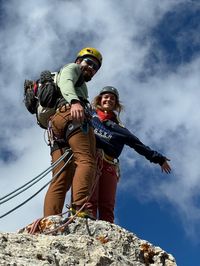
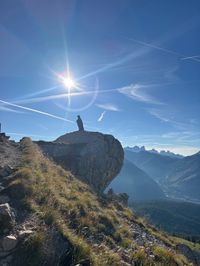
The route ends at a bolted anchor on the left side of the tower, but the actual top of the tower is a bit more to the right. You have to make a beached-whale move up a small ledge, and then it gets flat. The views from up there, especially to the east, are worth the extra effort. Just know that there are no bolts up there, and the top of the tower is not overly spacious.
Return to Rifugio Roda di Vael
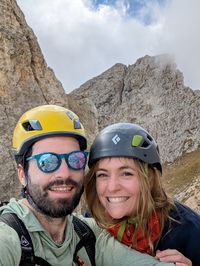
We took a bunch of pictures at the very top and returned to the rappel station. There, we rigged up our rappel setups — all three at the same time. That way you can cross-check each other’s setup for extra safety, and once the first person starts rappelling, you don’t mess with it anymore.
If you have 60 m twin ropes, you can make it down in one go, pretty much following the way you climbed up. If you only have a single 60 m rope, you have to do two ~25 m rappels. Once you’re back at the grassy band, the descent trail will be on your left when facing the wall.
There are one or two slightly narrower sections, so we stayed roped in and started our hike back. As we walked under the yellow, slightly overhanging wall of Torre Finestra, Cesare gave us an overview of all the routes on that wall. Some of them come from all the way down, some of them start at the band, but all of them are hard.
After about 10 minutes, the ridge on your right subsides and the trail merges with the main trail going up to the via ferratas. It was pretty busy when we were there, so we just joined all the people and started our descent to the rifugio.
Eventually, after a few switchbacks, the trail takes a sharp left and goes down through a steep gully. This section is equipped with cables, but it can easily get backed up with people. Luckily, there’s a shortcut. Well, it probably takes longer, but it’s definitely more fun.
Instead of going straight to the gully, you first go slightly right over the meadow and around a rocky outcrop. Behind it, there’s another gully. This one is even steeper, but it has a so you can easily rappel down. It’s less than 30 m, and depending on how dialed in you have your rap sequence, you might overtake a group or two struggling on the cabled section.
Once we were done with the second rappel, we joined the main trail again. From there it’s just a short walk back to the rifugio. The rifugio terrace was packed with people, so we ended up finding a table inside. We were still a little cold from the climb, so we didn’t mind. We ordered some panini, coffees, and the mandatory post-climb beers. We were happy.
Cesare ordered something in Italian, and we didn’t quite catch it at first. But then the waitress showed up with a giant slice of ricotta–chocolate cake. We were debating whether to order a piece too when Cesare hollered toward the bar in Italian again.
“I overheard them saying that the cake goes fast today and they only had one piece left, so I ordered it for you guys.” Above and beyond…
After the cake, we left the rifugio and took the same trails 549 and 539 back to the top station of the chairlift. Maintaining a steady pace, we were back at the car in no time. After that, it was a short ride back to our car, still parked at the hotel in Pozza.
We thanked Cesare and said our goodbyes, and that was it. That concluded our intro to trad climbing in the Dolomites. Are we ready to send these routes on our own now? Absolutely not. But we at least have an idea of how things work up there, and we have three routes that we can compare to whatever we might consider climbing on our own. Will we do something with a 5+ difficulty? Probably not. But something in the easy 4 grade is definitely doable with our skill level.
This concludes the series about our trad climbing course in Pozza di Fassa:
- Day 1: Via Piccola Micheluzzi on Piz Ciavazes above Canazei.
- Day 2: Via Fehrmann on Torre Stabeler of the Vajolet Towers.
- Day 3: Via del Gracchio on Torre Edwards in the Roda di Vael area.
Stay tuned for our next adventure!