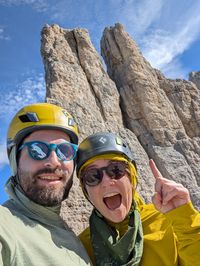
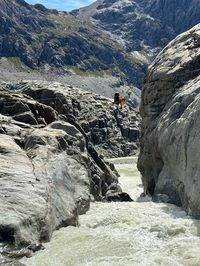
Today we’re looking back on Saturday, the second day of our trad climbing course in the Fassa Valley, in the heart of the Italian Dolomites. That day, Cesare, our alpine guide from , took us to the , where we successfully summited Torre Stabeler via the Fehrmann route.
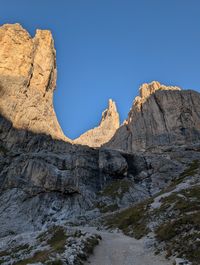
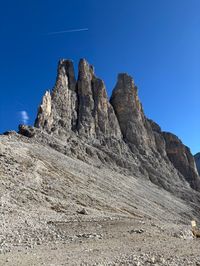
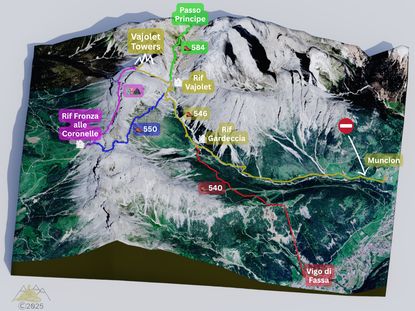
The Vajolet Towers are an eye-catching rock formation nestled deep in the Val di Vajolet (name checks out). They consist of three main towers — Torre Delago, Torre Stabeler, and Torre Winkler — that rise above (that also checks out).
Fun Fact no. 1 - The Valley Inception 
I found the word Vajolet a little funky, and when I asked Cesare about it, he explained that it has Latin roots. After some more digging, I found out that it most likely comes from Ladin, a Romance language native to the Dolomites. Ladin apparently originates from a street version of Latin spoken by Roman soldiers, with a sprinkle of German influence. The word Vajolet loosely translates to “a little valley,” which makes the Vajolet Towers something like “the towers in the small valley.” That makes sense. But then the valley is actually called Val di Vajolet, which literally means “the valley of the small valley.” Funny.
It’s a beautiful area with a rich history. It’s very rifugio-rich, and it offers a ton of great options for hiking, climbing (trad and sport!), and via ferratas. Definitely worth visiting. The only downside is that it can get really busy, especially in the summer and on weekends. Even in late September, we were surprised by how many people we ran into. On the other hand, the approach does require some effort, so don’t expect tour buses full of tourists either.
One of the reasons it can get a little crowded is that you can access the area from pretty much all directions:
- From the west, you can hike the 550 trail or through .
- From the south, you can take the to the ridge and then follow the 540 trail.
- From the north, you can hike the scenic 584 trail via Passo Principe.
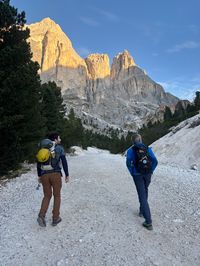
- And finally, from the east, you can take the small road via Muncion. That is what we did. There’s a small catch, but I’ll cover that in a minute.
Approach hike from Muncion GPX
Approach to Torre Stabeler
Getting to the Trailhead – Permit & Parking
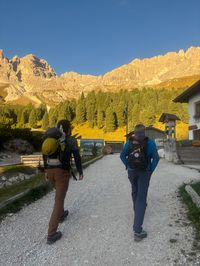
We agreed that we’d take Cesare’s car and drive together this time. Since the approach hike was a bit longer than the previous day’s, we decided to meet at 7:15 in front of our hotel. Not today, 7:30 breakfast, not today. 😿
Cesare arrived exactly on time, smiling and ready for another day in the mountains. We headed north through the Fassa Valley, but unlike the day before, at the roundabout between the towns of Pera and Mazzin, we took a smaller road toward the little village of Muncion.
While we were driving through Muncion, Cesare explained why he wanted to take his car. You’re only allowed to drive past the village and further into Val di Vajolet with a special permit. We obviously didn’t have that permit, but he did. If you’re planning to reach the Vajolet Towers this way, count on having to park in Muncion (if you’re lucky) and add an extra 4 km of uphill to your approach hike.
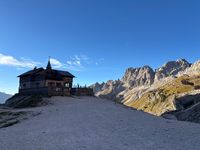
We zipped along the narrow road, and in just a few minutes, we arrived at Rifugio Gardeccia. Even Cesare’s permit could only get us this far, so we parked the car there and continued on foot — but not before a quick caffè at the rifugio and filling up our water bottles at the trough outside. Cesare, of course, knows the guy working there, and the atmosphere is cozy and friendly. There’s even a photo of him in the hut, which doesn’t surprise us at this point. After a few minutes of chatting, we finished our coffees, paid, and left. We’ve got rock to climb.
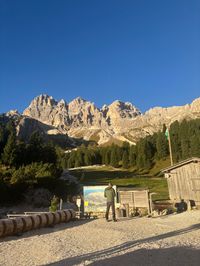
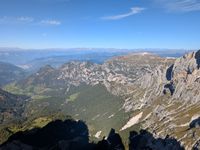
The hike from Gardeccia is very straightforward. Just follow trail 546 further into the valley. It starts off mellow and gets steeper near the end as you hit the switchbacks leading to Rifugio Vajolet. The main peak of the Catinaccio group, the Rosengartenspitze, rises on the left side of the valley. There are a handful of cool climbing routes up there, but all of them were, unfortunately, above our pay grade at the time.
We’re making our way toward Rifugio Vajolet when suddenly we hear a car behind us. We step aside to make way, but the car comes to a stop and the driver rolls the window down. Of course, Cesare knows this guy too. They exchange a few words, and Cesare lifts the cover of the truck bed. Are we getting a ride?! “Just move the pomodorini…” the driver shouts enthusiastically. We’re not getting a ride — but at least our packs are.
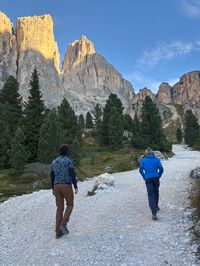
The car leaves with our packs, and we continue our hike. Rifugio Vajolet sits perched on a rocky outcrop at the far end of the valley. We ask Cesare if there’s any climbing on that rock, and he casually mentions that there is — and that, in fact, he bolted a sport multi-pitch route there.
It’s a fun five-pitch sport climb, fully bolted — three pitches up to 5a, followed by two very easy ones. The whole thing ends with a Tyrolean traverse that brings you just a few steps from the terrace of the rifugio. You can be sipping your beer before you’ve even taken your harness off. How cool is that? We’re definitely coming back to climb this route.
Note on Tyrolean Traverse
The Tyrolean Traverse is a mountaineering technique that originated in the Tyrolean Alps in the late 1800s. It involves rigging a rope horizontally across a gap between two towers, cliffs, or across a gorge. Think of it as a bridge in a place where building a real one isn’t practical or possible.
It can be a fun addition to a hike or climb, but there are a few things you should know to cross safely:
-
Material matters. If the rope is a regular static line or climbing rope, a standard aluminum carabiner will do. But if the rope is a steel cable (a common setup for more permanent or frequently used Tyroleans) you should use a steel carabiner. Otherwise, you risk the cable wearing through your softer aluminum gear, especially if there’s extra friction from a downward-sloping traverse or if you’re moving fast.
-
Attach yourself using at least two points. Typically, you’ll have one carabiner clipped into the belay loop of your harness—your main point of attachment. In addition, extend another carabiner on a sling tied into the tie-in points of your harness and clip it to the cable behind you. That’s your backup. If you’re hauling a pack, clip it into the backup carabiner and drag it behind you. It’s a good idea to attach your pack with two points as well, in case one fails.
-
Get your length right. Make sure your main attachment system is the right length. Too long, and you won’t be able to reach the cable; too short, and you’ll end up uncomfortably close to it.
-
When traveling in a group, and sharing steel carabiners or pulleys, bring a tagline long enough to reach the far end. Use it to pull the system back each time someone crosses.
-
Bring your own gear and don’t rely on there being a pulley. It might be broken—or sitting on the opposite side when you arrive. You’ll want at least one person capable of crossing on their own setup.
Below you can see me dangling on a tyrolean on a hike in Patagonia.
Hiking without all the climbing gear, we moved pretty fast and arrived at the rifugio in no time. We found our packs on a wooden bench behind the hut, popped in to say thank you, and decided to grab a quick coffee while we were there.
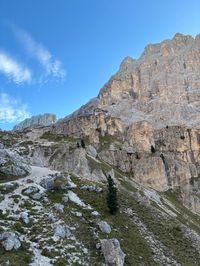
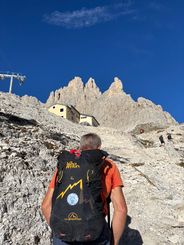
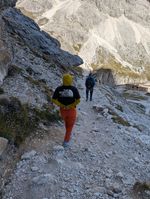
Our next stop was — yet another rifugio — sitting right at the base of the Vajolet Towers at around 2,600 m above sea level. To get there, we took trail 542, heading west through a steep gully. It’s only about 1 km long, but it packs a respectable 350 m of elevation gain. The trail is a little technical, but there are steel cables, so it’s nothing crazy. The only annoying thing is that it can get quite busy, and it can be difficult to pass people in the narrow rocky sections.

Climbing
Plan B: Torre Piaz Warm-Up
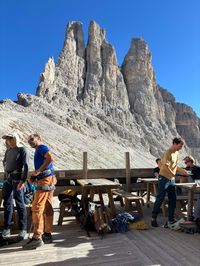
Since the hut was so close to our climbing route, we planned to put on our gear there and leave everything else behind. We didn’t want to limp to the base of the climb in our climbing shoes, so we decided to keep our approach shoes on and stash them at the base — as many people do. The hut also has a nice sun terrace facing the Towers, which is great for finalizing the plan of attack. What wasn’t so great was that from the terrace, we could see the Towers were very crowded that day, and we’d likely have to wait if we went straight away. Bummer.
Fun Fact no. 2 - The Vanishing Lake
There used to be a lake next to the hut. You can still spot it in some older photos and even on their website. But as Cesare told us, seismic activity in the recent past opened a few cracks in the rock beneath it, causing the lake to drain away. Since then, it’s become an ephemeral pond—a body of water that appears and disappears with snowmelt and rainfall.
We couldn’t confirm the earthquake story, but the fact that the lake sometimes exists and sometimes doesn’t definitely makes for a good fun fact.
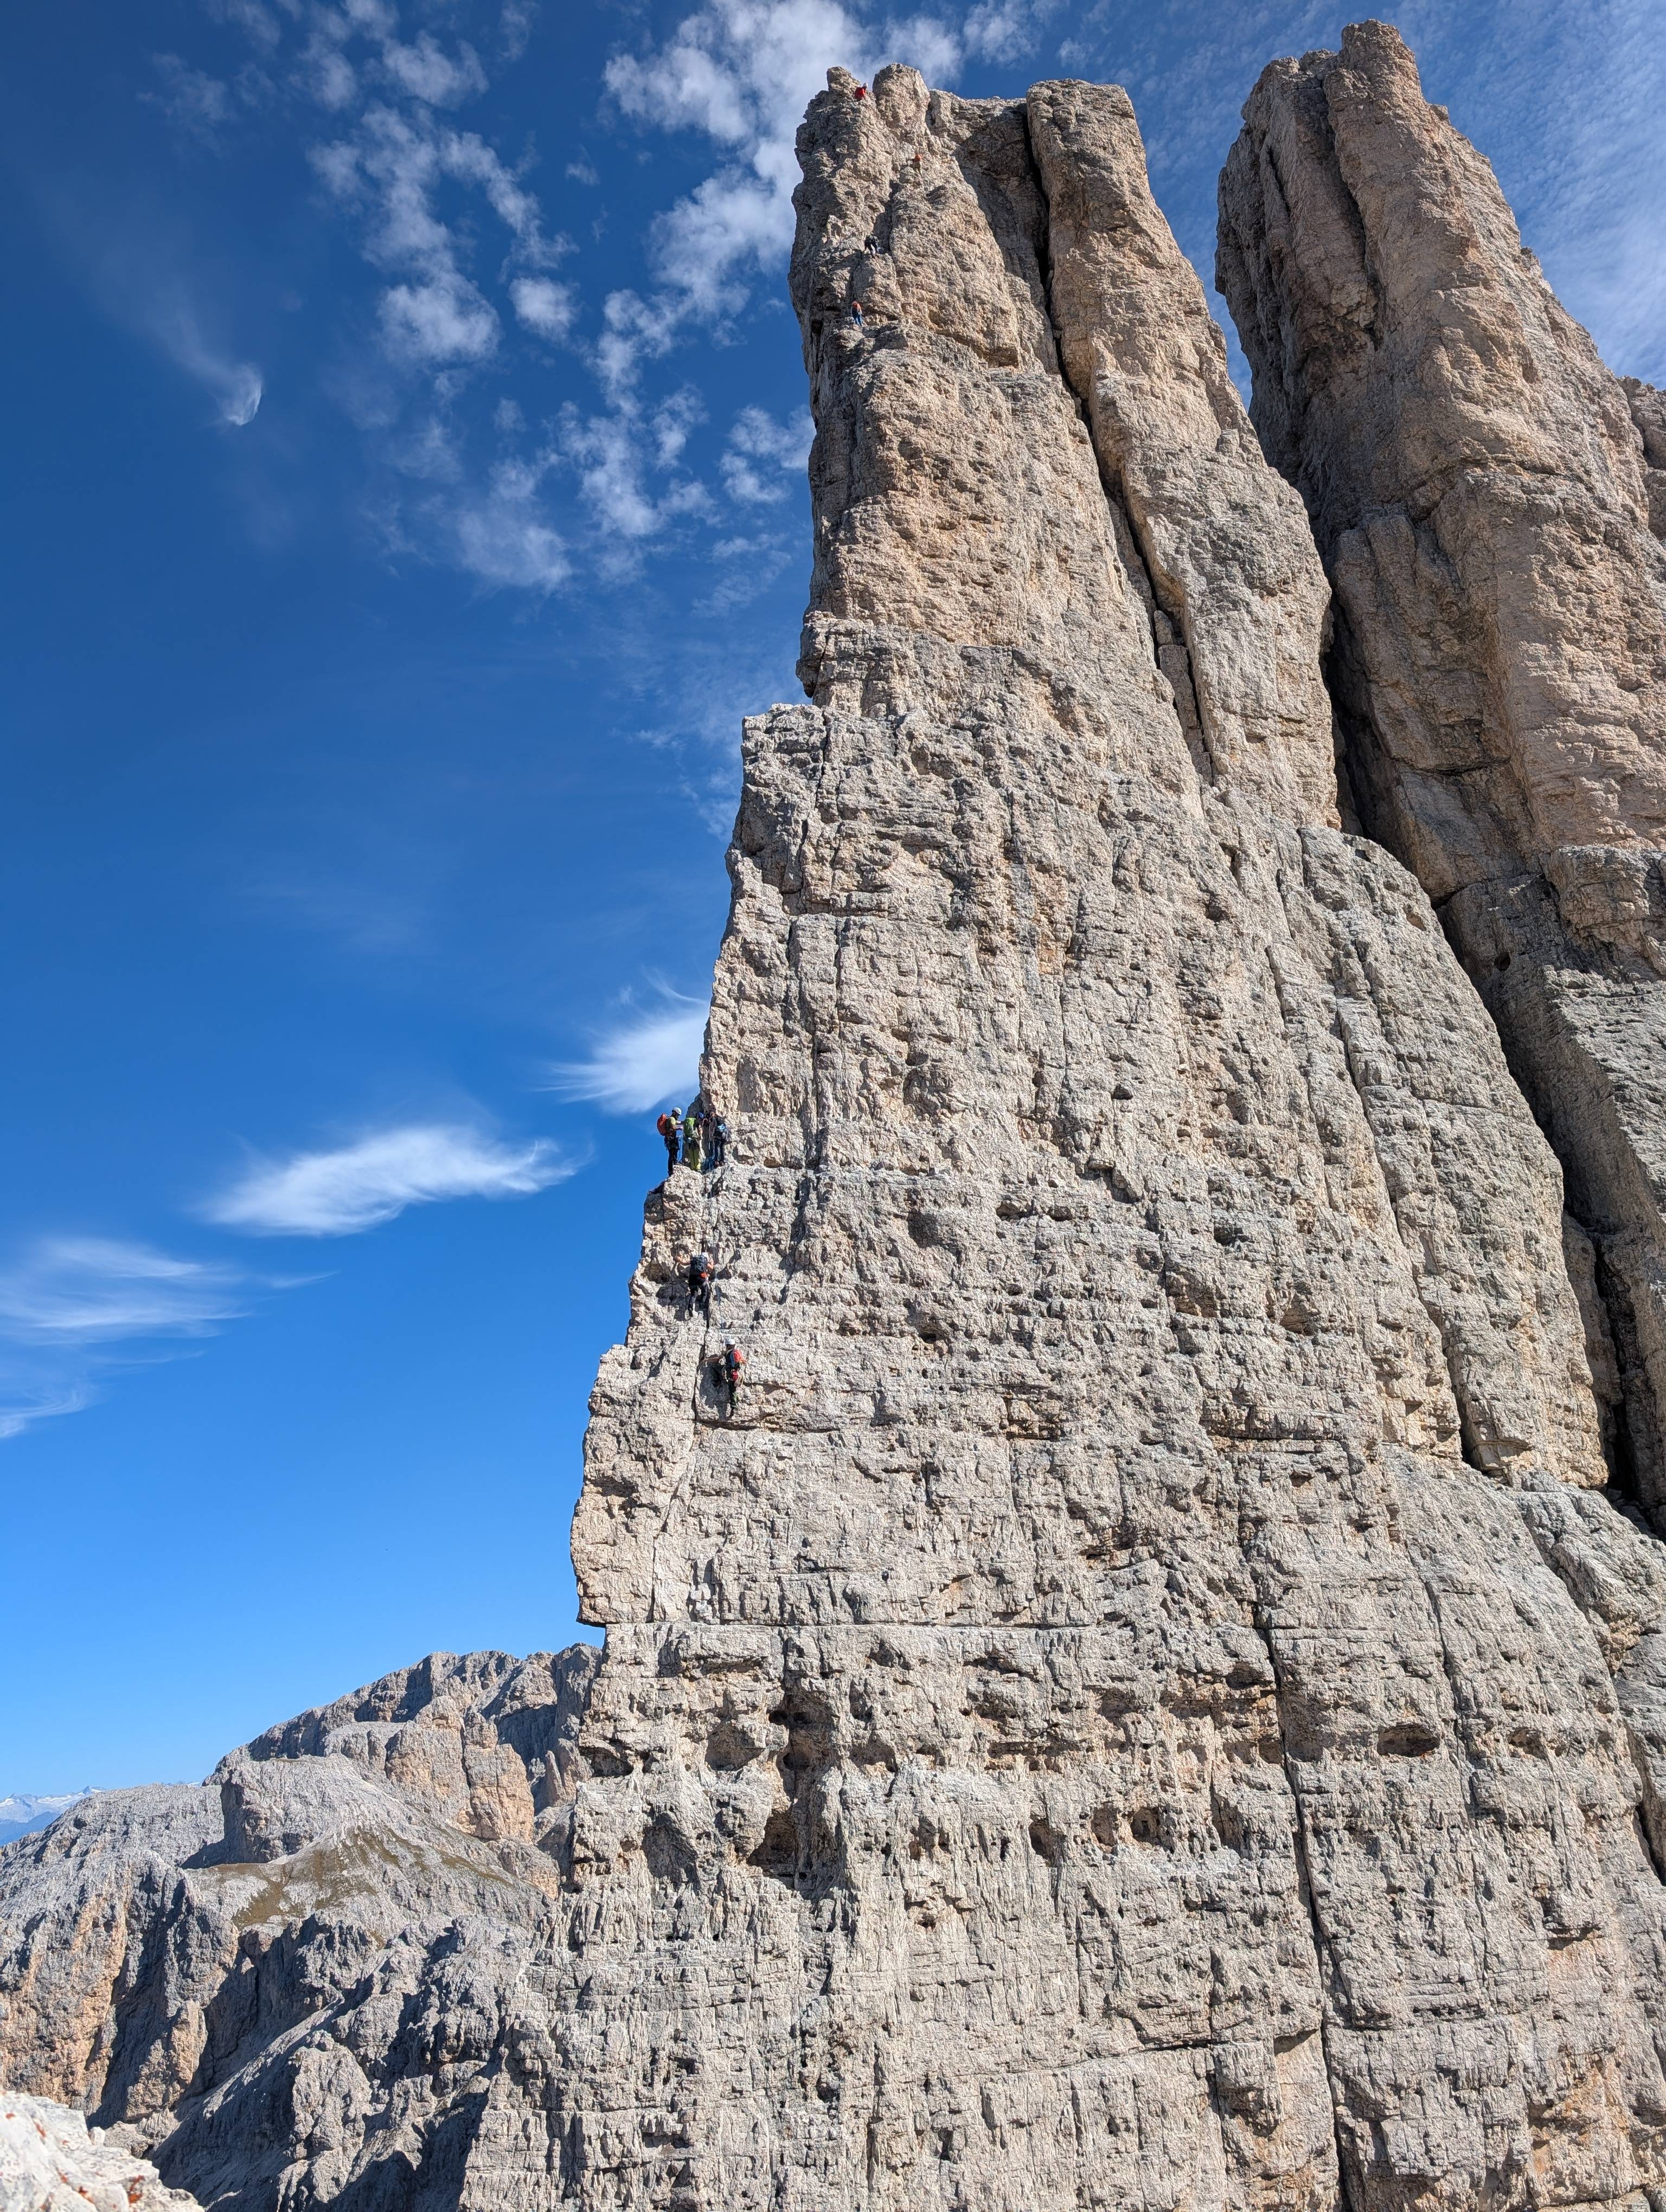
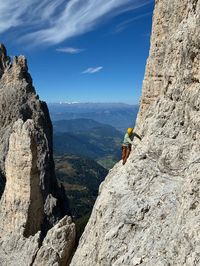
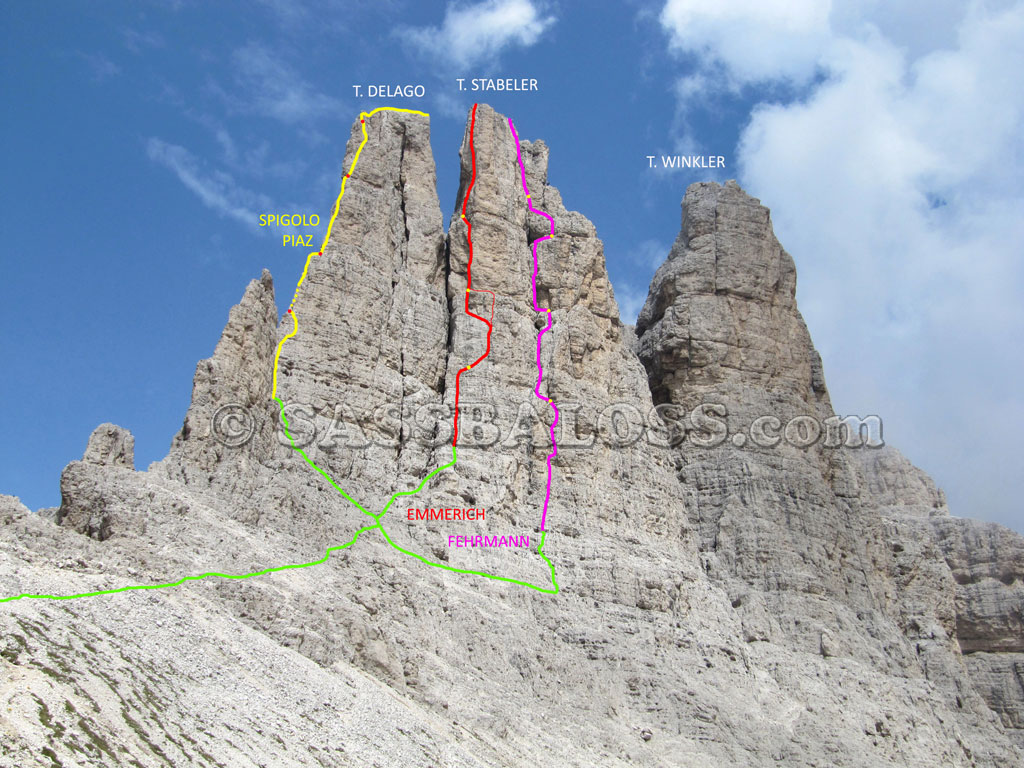
Choosing Via Fehrmann (Torre Stabeler)
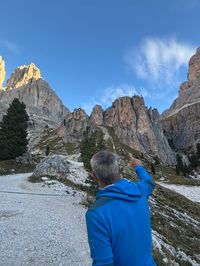
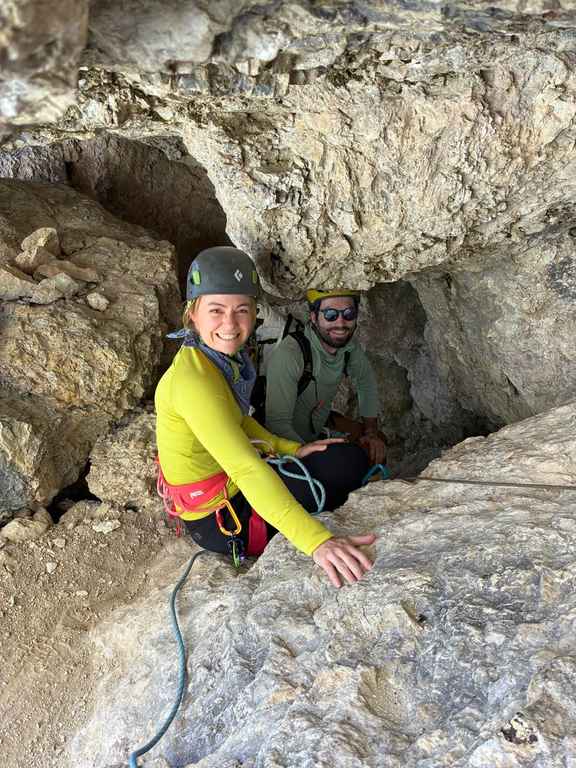
Luckily, Cesare immediately came up with a backup plan. Apart from the classic routes on the main Towers, there’s a shorter, less-frequented route on . It’s only two pitches of UIAA 4+, and you can rappel down in one go from the bolted anchor at the top with 60 m twin ropes. Basically, a consolation prize but it was perfect for us that day. We agreed to climb it and check out the situation on the main Towers from the top. Then we’d head to whichever route was the least busy.
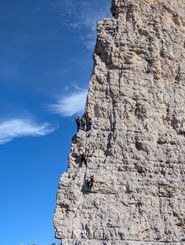
It took us about 40 minutes to get up those two pitches. From our vantage point, we could see that our best chance was the Via Fehrmann on the Stabeler Tower. We rappelled down from the little tower and quickly moved to the base of the next route. Again, this route is a giga-classic, and there’s already plenty of technical info out there. (description; topo) I’m just going to focus on a few practical things.
Route Overview & Key Pitch Notes
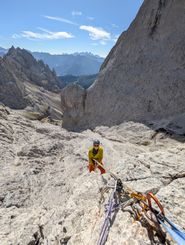
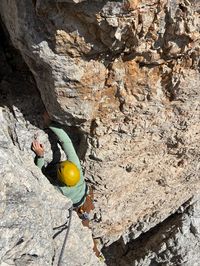
The whole route is about 170 m of climbing, split into five pitches. The bottom of the climb is slabby and gets progressively more vertical as you go higher. Towers be like that. We got through the first two pitches pretty quickly. The climbing was fun, easy, and straightforward. The belay station above the second pitch sits on a comfortable ledge, tucked into a small cave. Pitch three begins by exiting the cave via a slightly overhanging gully on the left side. That’s the crux of the climb.
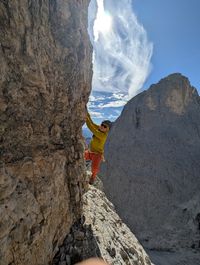
The fourth pitch has two variants: you can either continue straight up through another overhanging crack. That one’s a notch above what we were comfortable climbing at the time, and it’s often wet. Or you can traverse right and climb a considerably easier crack before returning to the left. That’s what we ended up doing. The downside is that you can get pretty bad rope drag, and it can be hard to hear your partner. Not a fun combination. So just take that into account.
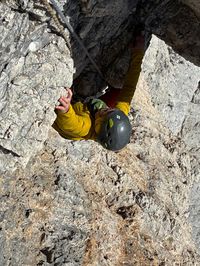
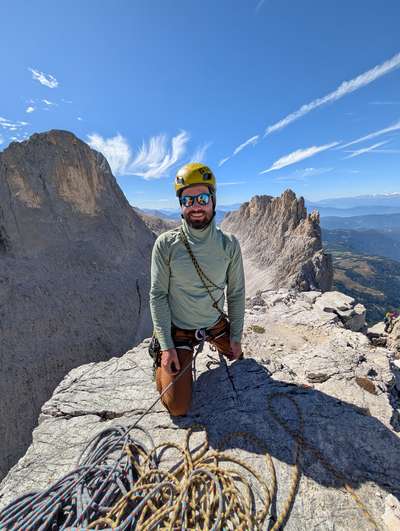
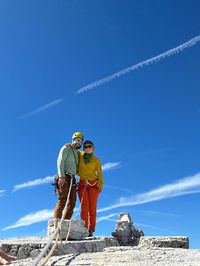
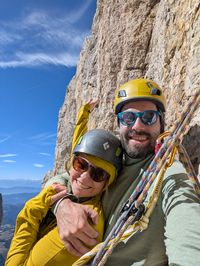
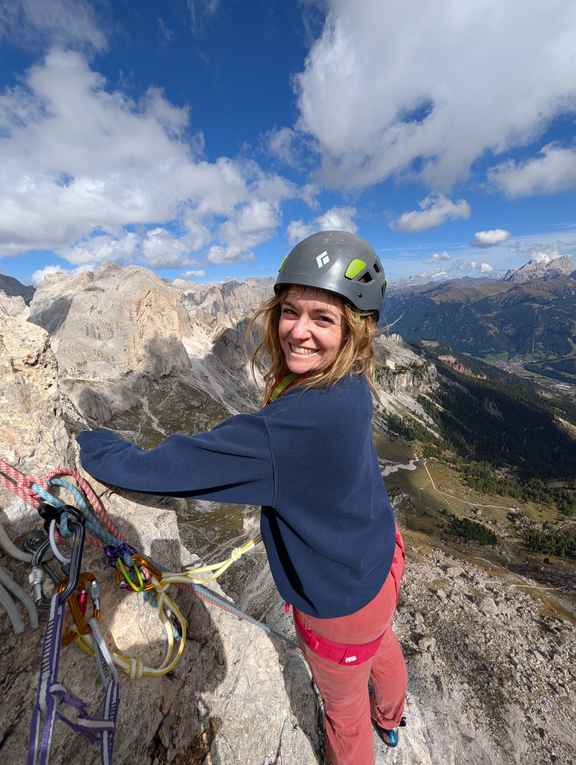
Pitch 5 is another 40 meters of fun climbing and then that’s it. We made it to the top of Torre Stabeler. The top of the tower is surprisingly spacious and the views are amazing. Especially on the west side towards Bolzano. We are actually overlooking the area surrounding Tires, which is where we were planning to hike in 2 weeks time. Check out the Tschafon hut report and the solo hike report from that trip.
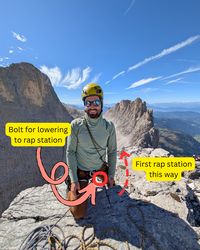
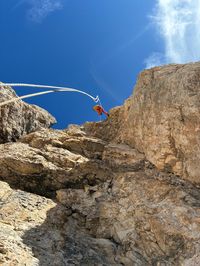
Descent: Rappels via Via Emerich
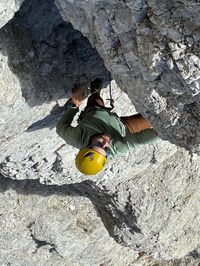
Once we took a few summit pictures, we were ready for the rappel. To reach the rap rings, you have to cross the top of the tower toward the west side and downclimb a few meters. There’s a bolt at the top you can use to secure the downclimb. From there, it’s two rappels (with 60 m twin ropes) and an easy scramble down to reach the base of the climb again. The rappels follow the Via Emerich, and they’re a lot of fun since you go over some big overhangs and end up free-floating in the air for a while.
Approximate Rappel Route GPX
Return Hike to Gartlhütte
It was a five-minute walk back to Gartlhütte. There, we packed our climbing gear and grabbed a sandwich, a radler, and a coffee — all well deserved. Then we set off toward the car. We got through the section with the cables pretty quickly, despite it still being quite busy. We didn’t stop at any other rifugios on the way back, and by 16:50 we were back at our hotel. Just in time for our aperitivo in the afternoon sun.
In the evening, we grabbed pizza at and called it an early night to get some rest for our last day.
